Showing posts with label make-up. Show all posts

Sunday, 20 May 2012

Make Up Tip No.4 - How to apply Mascara

Applying mascara doesnt have to be as tricky as it may seem, so here are a few tips to help you make the most of those beautiful lashes.

Make-up does go off, all products have an expiration period and you should be aware of this if you are keen to keep a healthy make-up bag, for more information on this, read about it here.

The average expiration period for mascara is 3 months, this is because the tube of the mascara acts as a breeding ground for bacteria.  You see we all have very tiny bacteria on our lashes and as you use your mascara it takes off some of this bacteria and distributes it into your mascara tube.  Now although this sounds gross, it is purely natural and nothing to worry about.  But the build up of bacteria in the mascara tube is exactly why you shouldn't keep your mascara for too long.  In addition to this, don't pump the mascara wand into the tube as this brings air into the tube and allows the bacteria to grow faster.

Image courtesy of www.bestbeauty-tips.com

Now enough of the technicalities, this tip is to help you apply mascara. When starting a new mascara you may find the wand holds a lot of excess product, to remove this simply scrape the wand across the opening of the tube as this allows the mascara to be kept for later applications and not wasted.

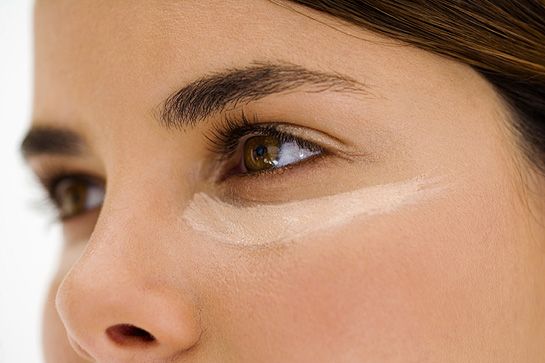
Once you have the right amount of product on the wand, you should rest the brush at the base of your lashes, it is best to start with your top lashes as these will need the most product on them.  Personally I find it easiest to have my eyes half open and looking down slightly as this will allow you to apply the product with minimal risk of it transferring onto your eyelid. Once you have positioned the mascara brush at the base of your lashes, gently wiggle the brush from side to side in a zig-zag motion moving away from your eye so you are applying the product to the full length of the lashes.  Once you have done this once, move along the lash line and start again.  Repeat this action until your lashes are completely coated in mascara, you may like to apply more than one coat depending on the look you are going for.

If you find your lashes are looking a bit clumpy, try using a clean mascara wand to comb through the lashes to separate as required.

I hope this is helpful and that you enjoy reading my tips as much as I enjoy writing them!

Friday, 27 April 2012

Bridal Photo Shoot at High Elms

Hello all my lovely readers,

I thought I would fill you in on my lovely day yesterday, I have recently been speaking to a local photographer about setting up some bridal photo shoots and yesterday was our first one together. After a rough start (as the model we booked didn't show up) but Amy the hair stylist managed to find a friend to fill in and it turned out to be a great day!!!! 

The photographer was Rob Purbrick of Purpix Media and Photography, see more of his amazing work here www.purpix.co.uk

The Hair Stylist was Amy Hemmings a freelance Hair Stylist

The Florist was Liz Williams of Williams Wedding Florist, see more of her lovely work here www.williamsweddingflorist.com/

And of course, the make-up artist was me! Take a look at more of my work here www.daniduffymakeup.co.uk/beauty.html

The shoot was at High Elms Manor in Watford, check out the location here www.highelmsmanor.com/

And the lovely model was called Fran.

We set up for a lovely bridal shoot, wanting a very natural look and that's definitely what we achieved.  Here are a few sneaky peeks at the images from yesterday.


Here's me and Fran, just putting the finishing touches to the lips,


Here's Liz adjusting her lovely flower hairpiece


The first finished hairstyle 


The amazing Fran looking lovely as a natural bride.   I kept the look very simple and light to make sure Fran's lovely skin and delicate freckles glowed through. I added some colour and highlighter to the apples of the cheeks and kept the look fresh-looking and summery.


 We then changed the look slightly and made it a bit stronger to match this lovely dark interior of this room. We also got to try out this lovely headpiece.


Here's a picture of the lovely stairs at High Elms Manor


And just a couple of shots showing how much fun we had during the day!

The day was a complete success and we all really enjoyed it! Fran looked amazing and really helped us all capture the images that we wanted.

Hope you all liked them too, I can't wait to see the final photographs!

Saturday, 14 April 2012

Make Up Tip No.3 - How to choose and apply the right concealer

Do you ever look at yourself in the mirror and think, where on earth did those bags come from? I know I do!

Whether it was a heavy night, not enough sleep or just natural shadows we all have those off days when our under eye shadows can really get us down. So rather than skulking back under the duvet, be proud of your skin and use some concealer to hide those under eye circles.

Image courtesy of http://www.hellomagazine.com

To begin with, don't get confused between colour correctors and concealers. Colour correcting products should be used to even out skin undertones and wont help to conceal blemishes and under eye circles.

When choosing your concealer, pick a colour that is closest to your foundation colour and skin tone.  The colour should exactly match your skin to give a flawless look. You should also consider the consistency when picking your concealer products, to cover blemishes opt for a creamier consistency whereas a more fluid formula is better for covering under eye circles.

To apply, use your ring finger (as it applies less pressure) and dab small dots of concealer along the under eye area and then gently press into the skin.  The skin around your eyes is so delicate you should not rub this area.

Apply concealer before your foundation, then apply foundation in the normal manner.  If required add a touch more concealer on top and then dust with translucent powder to set.

Happy Concealing my lovelies!!


Wednesday, 11 April 2012

Product Review: Model in a Bottle


Hello lovely followers,

I have recently discovered an amazing blog and website called makeupgeek.com, the main artist on there Marlena has some great tutorials and looks.

So while I was at work, I checked out a few of her video’s and a very interesting one was of her showing her followers what she packs for a Bridal Shoot.

http://www.makeupgeek.com/articles-reviews/how-to-pack-your-traincase-for-bridal-work/

In this video, there was one product that really jumped out at me, it was the Model In a Bottle: Make up setting spray.  I had never heard of this product before but as I have a couple of Wedding Make-ups booked, I was intrigued and just had to try it.

image
This item is made in the USA and as far as I could tell from a quick scan of the internet in my lunch break, there aren’t many places that sell this.  However, there are a few UK based sellers on Ebay that do!  So I managed to get my hands on a bottle for £16 (including free delivery) and it was at my door within 48 hours!  I couldn’t believe it!

So today, as part of my more dramatic work look, I finished it all off with a couple of sprays of this Model in a Bottle.  The packaging tells you to apply your make up as usual, wait for your mascara to dry.  Close your eyes and spray evenly 1-2 inches from your face and then wait 20-30 seconds for it to dry before opening your eyes.

I have to admit, I was sceptical I didn't think there could be anything that could keep my make-up on for the whole day!  Be warned, this isn't a miracle cure, your make up does still fade and run slightly but I don't think anything will ever stop that completely (but we can keep hoping).  But it does work!  For the first time in a long time I have actually returned from work and I still have a full face of make up on!

I’m prone to breakouts, especially on my chin, so usually by the time I come home I look like I went out with no make up on.  OK, so maybe I’m exaggerating a bit but I still look worse than when I went to work.  But today, I looked loads better! Hmm, maybe I’m not explaining this properly, today I came home with a full face of foundation still (a bit oily in the normal area’s but as I said its not a miracle cure), I still had colour on my cheeks and my eye shadow was in tact.

To summarize, this product is a hit!! At £16 for a bottle, that is said to hold 300 sprays I think this will become a permanent resident in my make up kit and on my shoots.

Thursday, 5 April 2012

Make Up Tip No.2 - How to choose the perfect foundation

Choosing the right shade of foundation is a very crucial part of your make up routine and it’s one that you can easily get very wrong - Which is why there are so many Oompa Loompa’s walking around nowadays (you all know exactly who I mean!)

Foundation should never be used to add a tan to your skin, but should be used to create a flawless base for the rest of your make up. Think of yourself as an artist and where you have to prepare your canvas before applying the paints.

The shade of foundation you choose should perfectly match your skin tone (not darker or lighter) an the tip to find this is to lightly apply the foundation along your jawline and see if it disappears when you blend it. You use the jawline because it is an area on your face that is least touched by blemishes. Now I know this may make you look a tad silly when you’re standing in the aisle of Boots but trust me it’s worth it when you can walk around with perfect looking skin.

It is also important to check the colour in natural light rather than artificial to make sure the colour is right for you!

Friday, 30 March 2012

Pat McGrath - Spider Lashes

Pat McGrath is an amazing make-up artist and an inspiration!

Check out her Spider Lashes here

These look great! I plan to try them out later!

Tuesday, 27 March 2012

Make Up Tip No.1 - For Longer Lasting foundation


image
A tip for longer lasting foundation:

We all want our foundation to last for the whole day, but it seems to slide off throughout the day.  It’s always good to moisturise before applying your foundation, but make sure you don’t apply too much.  In addition to this, try and leave your moisturiser for approximately half an hour before applying your foundation so that it has been absorbed into your skin and this will help your foundation to glide on smoother and last for longer.

Wednesday, 21 March 2012

Product Review: Maybelline Eye Studio Lasting Drama Gel Liner


Maybelline Gel liner application


Maybelline Eye Studio Lasting Drama Gel Liner

I hadn't heard anything about this product, no massive adverts on TV with the latest Supermodel/Superstar, but I came across it during my weekly peruse of the Boots.com website and the latest items section.
I have to say I was curious, so I popped into my local Boots and picked up one of these baby's for £7.99 and it was definitely worth the money!

If you ever have problems trying to draw your eye liner close enough to your lashes to make it look seductive and sexy, but in reality you end up 3mm away and leaving a white line inbetween then this is a 'must have' for you.  The brush allows you to apply the liner directly to the lash line, pushing the colour into the roots and by using gentle strokes you can get a nice smooth line across the length of the lash line.

Because of the consistency of the liner, it is easy to apply and depending on how much you pile onto the brush will determine how the liner will go on. Make sure you keep the brush fresh and clean and you will get a smooth line every time.

Although the pot looks quite small, there is a lot of product in there and you don't need to use very much when you're applying it so I think it will last a long time.

I think this is a great product, and once it has dried, the gel liner is smudge proof and lasts all day!

Maybelline gel liner 1

Maybelline Gel liner 2

Friday, 16 March 2012

This sounds about right - Make-up costs over a lifetime!

This article tells of a survey of British women and their make-up spending habits.  Oh how much we would save if we didn't wear make-up!

£100,352 on make-up over the course of a lifetime, but does that take in to account those who have an obsession with make-up?  hmmm, I wonder….

Read the article here

Wednesday, 14 March 2012

Readers Questions...

Hi all my lovelies, so I recently received a question that I thought it would be good to answer online in case it can help anyone else, so here it goes!!

Question from livelifeandbebrave.tumblr.com

"Hello, so I've been trying to find a good bronzer for ages and I'm not the type of person that trys every brand of make up. Do you know of a good bronzer that'll give you a natural glow?  By the way I'm in love with your blog I find it very helpful:)"

And here's my answer:

"Hiya!! Thanks for your question and kind words! :)
I think Bronzer can be quite a tricky thing to apply depending on your skin tone.  So I suggest whatever colour you try, start by applying it lightly and building up the colour.  It’s alot easier to add colour than it is to remove it, and slapping on lots of colour straight away is a sure fire way to get the oompa loompa effect! ;)
Personally, I like to use MAC’s Mineralize skinfinish it has a high metallic finish which is great to add a glow to your skin, and I like ‘Soft and Gentle’ for pale skins as it add s a hint of colour but not too much. For more colour, or darker skin tones the ‘Gold Deposit’ has a stronger finish.  If you want something with less shimmer, they also have a Mineralize Skinfinish Natural collection and a range of Bronzing Powders. MAC’s products are great and are highly pigmented, sometimes they can seem a bit pricey, but they always last and so are worth every penny.
Alternatively, I find Dior’s Bronzers are great and add a soft natural colour to the skin, but are high on the price range for make up.  For everyday wear I use a Collection 2000 shimmering bronzing powder which is great and I have suggested it to many people who have agreed.  At £2.79 it is a great bargain and well worth it as it glides on smooth and adds colour and shimmer to the face, but I am not sure Collection 2000 is available in the US.
I believe NARS, Sephora and Too Faced also have great bronzing products, but I am yet to try them out.  
I know you say you don’t like to try every brand but I would suggest taking a trip to where you usually buy your make up from and just try as many as you can! Even just a sweep across the back of your hand will allow you to tell how easily, smoothly and strongly the product applies and then just pick your favourite.  Make up is not about getting it right each and every time, have fun with it, play around with different colours and products and as long as you enjoy yourself you cant go wrong!  When I’m out shopping I’m forever walking around with loads of colour swatches across my hands!  A good tip is to take a handy pack of wet wipes in your bag as the shops never have enough tissues! ;)
Thanks for reading, I hope this helps and keep an eye out for more product reviews to come!!
xxxxxxxx"

If anyone has any other questions they would like answered, please do not hesitate to send them to me at dani@daniduffymakeup.co.uk


Friday, 9 March 2012

Product Review: Revlon Colourstay Foundation

Hi all you lovely people, I recently found this old post I was writing and thought it would be good to publish it!

I feel like I have been stuck in a bit of a rut recently when it came to my own foundation. I usually stick to the same foundation all through the winter and then find a lighter (in terms of texture of course) product for the summer months.  So when it came time to throw caution to the wind and explore the cosmetic aisles for a new foundation, I honestly didn’t know where to start.  Although I love make-up in its entirety and I love trying out lots of new products, when it comes to my daily skincare and make-up routine, I am always far too cautious and run away from change!  (As I am typing this, I realise just how ridiculous that sounds.)

I was a tad cautious to begin with, as my combination skin type is prone to breakouts and always feels like I need a heavy foundation to try and mask them.  So, to start my life revolution off with a bang, I popped to the nearest Boots and purchased Revlon’s Colourstay and Photoready foundation.


Revlon’s Colourstay foundation is a deceptive little bottle of magic.  The glass bottle has no pump dispenser which is disappointing, and means that it is not in ‘handy’ packaging that you could keep in your bag for touch ups throughout the day.  But then you wont need to!  I was completely astounded by how long this make up lasts for! 

On one particular day, I was heading out straight from work and so would have no time to re-do my make-up, so I applied my morning routine in the normal way before going to work; moisturiser, primer, concealer, foundation and then powder to set. I was amazed that come 5pm, all I needed was a slight dusting of powder across my T-Zone and a touch more blusher and I was made up just as well as I was that morning!

I have heard of many products that claim to be long lasting but this one really does live up to the name.  Now, I do believe some of the ‘long-lasting’ magic was because I had primed and set my foundation, but even on the days when I do not feel like using a primer, this product still lasts all day.

The foundation is a liquid texture and glides on smoothly to provide a medium to full coverage, which is buildable depending on how clear your complexion is.  It is lightweight and feels natural on my skin even when I add powder and have a face full of spots.

I love this foundation, and recommend it to all!  It is available in 12 shades and contains SPF15 which is crucial to keep your skin protected against the sun all year round.  I also love that it comes in a Normal/Dry skin formula or Combination/Oily skin formula which shows me that this company really puts logical thinking into its ranges, helping its consumers make sure that they are getting the right product for their skin type.

At £12.49 a bottle, this isn’t ‘cheap’ but in comparison to more premium brands like MAC or NARS this is a bargain.  Plus, as I have said before, this product is deceptive!  You may not think there is much left in the bottle after a month or so of use, but it just keeps going, providing a great flawless finish!

Saturday, 18 February 2012

Why Don't YOU Wear foundation?

I found this great article from Kay Montano about why people don't wear foundation.

It is so true that most women will go into a department store or shop looking for the right shade of foundation, pick one they like and then come home to find it looks a completely different shade to what it was in the shop and then it get demoted to the bottom drawer never to be worn again.  I don't think I have ever met a woman that hasnt been through this.

When trying out a new foundation before purchasing it, you should test it along your jaw line, this will allow you to see the base colour of your skin as you will have less sunlight affecting the colour of your skin at the jaw line.  The perfect shade will disappear along the jaw line, if you want to make doubly sure you have the right shade, try applying a lighter and darker one either side to see which one disappears best.  Then walk outside and see if has still disappeared into your skin.  Please remember the lights are bright in department stores and will show differently to natural light.

Also, whatever you do do NOT let anyone in the shops pressure you into buying a foundation colour or product you are not completely happy with.  Remember, it is your hard earned money you are spending and the last thing you want to do is to spend it on something that will sit in your dressing room table for the upcoming months.

To read Kay's article, click here

If you do find it hard to select the right shade, and do feel intimidated when you enter a department store to buy make-up, why not try a complimentary facial from your local Mary Kay Independant Beauty Consultant.  The Mary Kay range of foundations is very large and has shades coveing the palest snow white, to the darkest bronze skin under the sun.  All of the products are backed with a 100% Satisfaction guarantee, so if you decide you do not like the shade selected for you, you can swap it for a better match.  Now you dont get that at Boots!  For more information take a peek here

Thursday, 26 January 2012

Loving this......Dressing Table Inspiration and Lighting Tips

Dressing Table Inspiration and Lighting Tips


This is a great post by Makeup Savvy, with some amazing images of peoples homes and their dressing table areas!  The amount of light you have to apply your make-up in will make a world of difference! So please take a look at this as it has some very useful tips.
Related Posts Plugin for WordPress, Blogger...